Creating Users
Using this procedure, you will create the user.
-
Select Access Menu and then select Security | Users.
In your list of users, there is a new user account named ADC Default, which cannot be edited or deleted. Enact uses ADC Default for all automated data collection tasks.
-
In the Users landing page, select Create User.

- In the First Name data field, type the user's first name.
- In the Last Name data field, type the user's last name.
-
To configure the user image, locate the optional image item, and then do one of the following:
- To upload an image when no image currently exists, select More, select Upload Image, and then browse to the new image (maximum image size 600 KB; file types JPG, GIF, PNG, BMP).
- To change an existing image, select More, select Change Image, and then browse to the new image (maximum image size 600 KB).
- To remove an existing image, select More and then select Remove Image.
InfinityQS recommends resizing images to an aspect ratio of 4:3 (for example, 160 pixels wide by 120 pixels tall).
-
At Email Address, if the user has a company email address to which the automated Create Your User Password email can be sent, enter that address and then skip to step 7. The automated email guides the user through the creation of a password, after which he or she will be able to log in to Enact. If the user does not have a company email address, which is often the case for temporary personnel, complete an alternative password-creation procedure. There are two such procedures from which to choose: Option 1: Creating a Multi-Use Password and Option 2: Creating a Single-Use, Initial Password.
Option 1: Creating a Multi-Use Password
This option involves another employee creating a password on the user's behalf and sharing that password with the user. The employee who creates the password can be any user who has the Manage password emails for users with no email permission. As part of this procedure, all users with this permission are sent the automated Create Your User Password email mentioned above. One of the recipients needs to follow the email's instructions to create a password on behalf of the user. The password created can be used multiple times.
- Click the left-pointing arrow at the right end of the Email Address text box. (If a left-pointing arrow is not visible, no alternative password-creation procedure can be used. The arrow is hidden when the Require Email for all users security setting is enabled.)
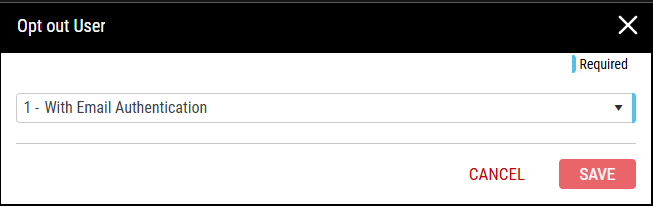
- In the Opt out User window that appears:
- Expand the Select list.
- Choose 1 - With Email Authentication.
- Click Save.
- Go to step 6 and complete the remainder of this process.
- Ensure one of the employees who receives the [Enact] Create Your User Password email follows the email's instructions and then relays the password created to the user along with the user's company ID, username, and the Enact URL.

Option 2: Creating a Single-Use, Initial Password
This option bypasses use of the automated Create Your User Password email. It involves creating an initial password for the user and communicating that to him or her. Following the first use of this password, the user will be forced to change it.
- Click the left-pointing arrow at the right end of the Email Address text box. (If a left-pointing arrow is not visible, no alternative password-creation procedure can be used. The arrow is hidden when the Require Email for all users security setting is enabled.)
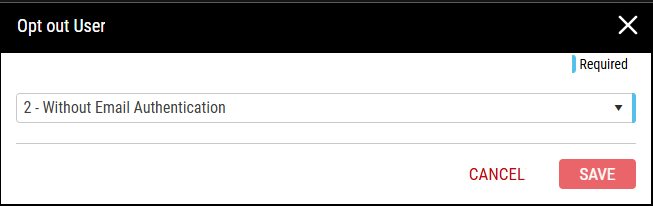
- In the Opt out User window that appears:
- Expand the Select list.
- Choose 2 - Without Email Authentication.
- Click Save.
- In the Confirmation Message that appears, if you are comfortable with the security risk, click OK.
- Locate the Initial Password text box now visible in this page’s lower right.
- Click the information icon to the right of this text box and review the current password requirements.
- Enter a password in the Initial Password text box that complies with those requirements.
- As needed, note down the initial password for communication to the user.
- Go to step 6 and complete the remainder of this process.
- Once this process is complete, contact the user and relay to him or her the initial password along with his or her company ID, username, and the Enact URL.


-
In the Username data field, type the user's login username. The username can contain alphanumeric characters, and it must be unique.
The required username length is set under the Credential Settings Tab in the Configuring Security Policy page.
-
In the activation section, you can manually set the user Activation Start Date and Activation End Date. User's with an Activation End Date that has passed will be automatically marked as inactive.
Inactive users will not be able to log into Enact and will not receive notification emails, nor will they be eligible for license assignment.
Also, if you create a user and do NOT manually set the Activation Start Date, Enact automatically activates the user, setting the Activation Start Date to the date you saved the user.
To manually set the activate start and end date, select Calendar and select the desired date. Updating an Activation End Date that has passed to the present or a future date will remove the inactive status for a user.
- In the Role drop-down list, select the level of privileges, which grant the right to access and edit specific functions and elements.
-
In the Access Level(s) data field, you set what the user can see in Enact. To set the access level, do the following:
-
In the Access Level(s) data field, select Access Level(s).
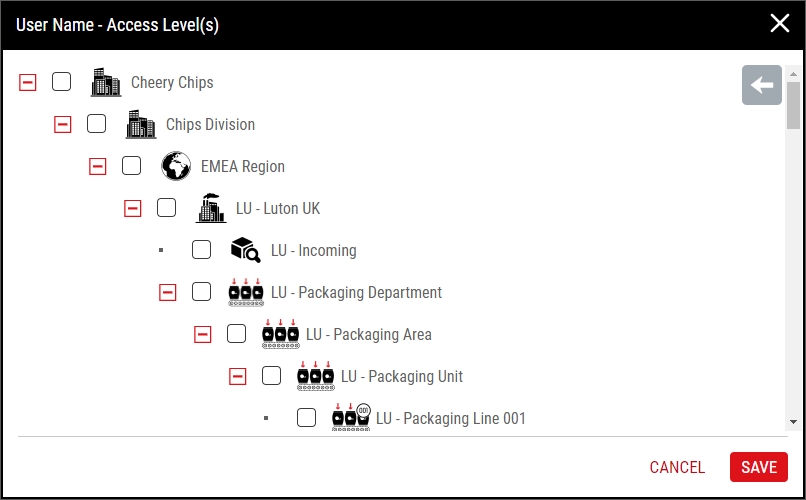
- In the Access Level(s) dialog box, select the sites, areas, and processes that the user can see. If you check a top-level process, the user will also be able to see every process underneath that level.
- Select Save.
-
-
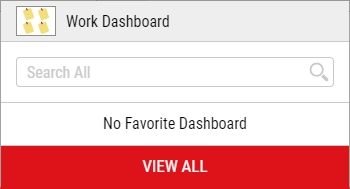
In the Assigned Work Dashboard drop-down list, do the following:
- To enable the user's work dashboard, select Yes.
- To disable the user's work dashboard, select No.
For more information about work dashboards, please see Managing Work Dashboards.
If you assign a work dashboard to an existing user, that user must log out and log in to see the work dashboard in the select dashboard dialog box.
-
In the Preferred Language drop-down list, select the user's preferred language, which also sets the appropriate time representation (12 hour AM/PM or 24 hour).
Enact currently supports the following languages:
 Supported Languages
- Danish - Denmark
- Dutch - Netherlands
- English - UK
- English - US
- French - France
- German - Germany
- Hindi - India
- Italian - Italy
- Norwegian - Norway
- Portuguese - Brazil
- Spanish - Mexico
- Spanish - Spain
- Swedish - Sweden
- Vietnamese - Vietnam
-
In the Assigned License drop-down list, do the following:
- To grant a license to the user, select Yes.
- To deny a license from the user, select No.
Users who have been marked inactive cannot be assigned a license and the entry will be frozen and default to No. For more information about licenses, please see Licenses.
-
To designate in which department the user license resides, do the following:
- Locate the Department data field.
- In the Department drop-down list, select the desired department. Hint
For more information, please see Viewing License Report.
The Department data field is for recordkeeping purposes only
-
In the Menu Template drop-down list, select the desired menu template. Hint
For more information, please see Menu Templates.
- Select Save, or Save & Add Another.
- If, in step 5 above, you used an alternative password-creation procedure, ensure any remaining actions from that procedure, such as communicating login details to the user, get completed.


