Viewing License Report
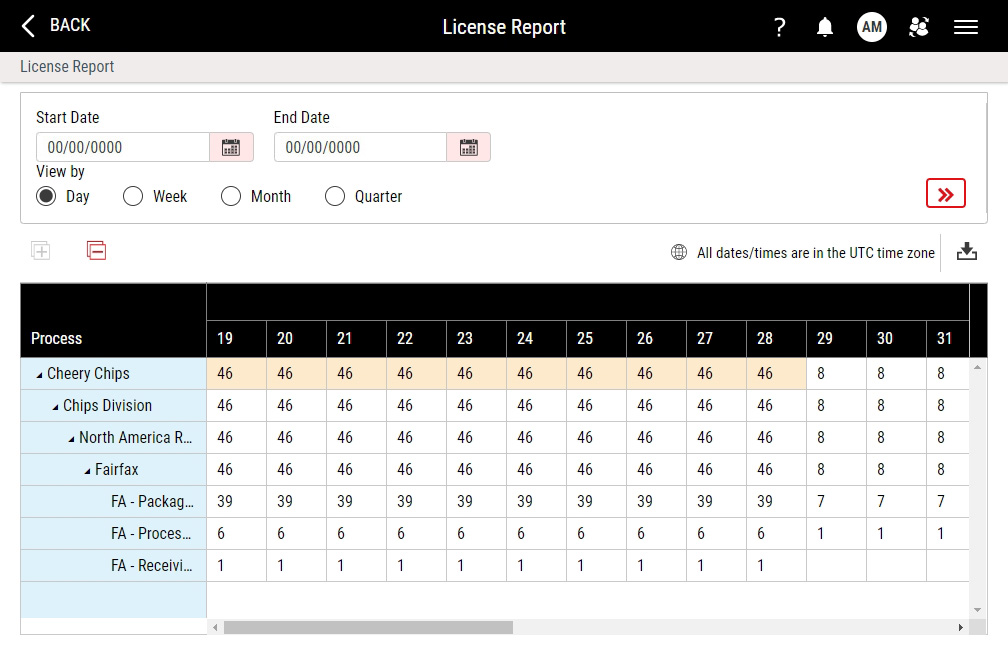
Using this procedure, you will track license usage by department and by timing interval (Day, Week, Month, or Quarter), based on the Department data field for each user and workstation. The license report is organized by process hierarchy, as follows: Company > Division > Region > Site > Department. The License Report page displays the total billed licenses, including connections licenses.
At the company level, Enact highlights the cells containing the highest license allocation in the selected date range.
As noted in the License Report page, Enact displays all dates and times in UTC time zone, rather than the local process time zone. For example, if a new license assignment occurs on January 1 at 10 PM EST for a department in the EST time zone, the license report displays the date of this license as January 2, since UTC is 5 hours ahead of EST.
The license report preserves all historical billing information, and will continue to list departments that you previously deleted and purged. However, Enact does not continue to store language labels for purged departments, listing them instead under their short names.
- Select Access Menu and then select Security | Licenses.
-
In the License Management landing page, select License Report.
-
You can set the date range of the license report up to 180 days. To set the date range, do the following:
- In the Start Date data field, select Calendar and select the desired date.
- In the End Date data field, select Calendar and select the desired date.
- In the View by data field, select the desired timing interval (Day, Week, Month, or Quarter). Enact groups the license count by the selected timing interval.
- Select Select.
-
To expand a process hierarchy, select Expand.
To expand all levels, select Expand All.
To collapse a process hierarchy, select Collapse.
To collapse all levels, select Collapse All.
-
To download the contents of the license report into a Microsoft Excel spreadsheet, do the following:
- Set the desired date range using the Start Date, End Date, and View by data fields above.
- Select Download.
- In the Download dialog box, select Save, and in the Save As dialog box, browse to the desired save location on the computer (for example, the Windows Downloads folder).
- In Microsoft Excel, open the saved file and examine the contents of the downloaded license report. Microsoft Excel displays the contents expanded or collapsed as it was in the license report.
- Select Back.


