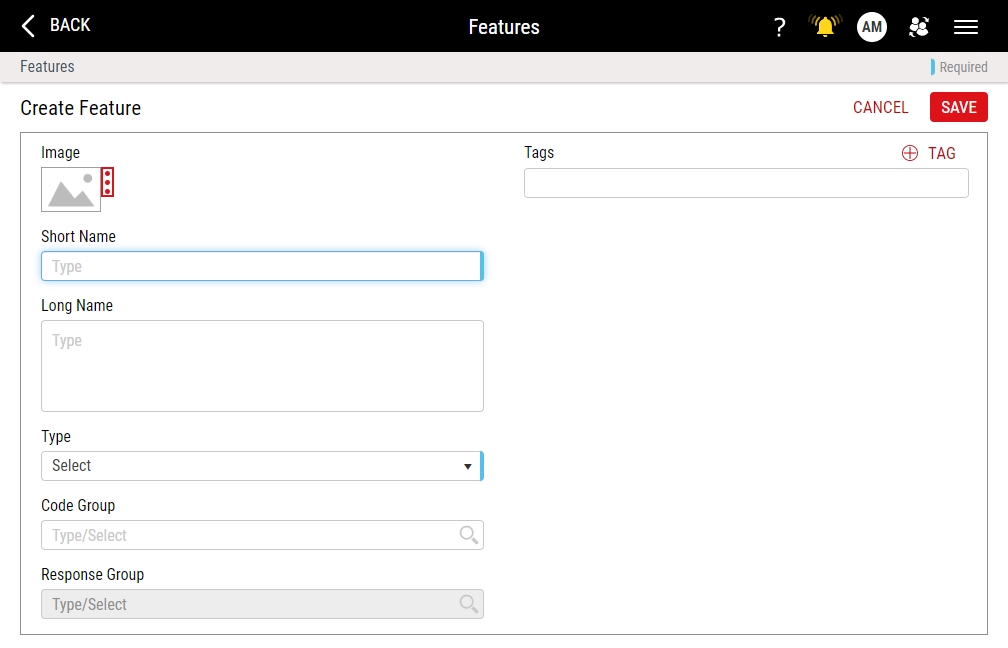
Creating Features
Using this procedure, you will create the feature.
- Select Access Menu and then select Feature | Features.
-
In the Features landing page, select Create Feature.
-
In the Short Name data field, type the feature name.
If you type a name of a removed feature, Enact displays the message, "Short name already exists as removed record." Do one of the following:
- Type a different name.
- Restore the removed feature and modify its settings. For more information, please see Restoring Removed Parts.
- Purge the removed records. For more information, please see Purging Data.
-
To configure the feature image, locate the optional image item, and then do one of the following:
- To upload an image when no image currently exists, select More, select Upload Image, and then browse to the new image (maximum image size 600 KB; file types JPG, GIF, PNG, BMP).
- To change an existing image, select More, select Change Image, and then browse to the new image (maximum image size 600 KB).
- To remove an existing image, select More and then select Remove Image.
InfinityQS recommends resizing images to an aspect ratio of 4:3 (for example, 160 pixels wide by 120 pixels tall).
-
In the Long Name data field, type the extended name of the feature.
If you set the feature type to Checklist, Enact uses the contents of the Long Name data field as the displayed question in the checklist.
If you type a URL in the data field, Enact automatically converts the URL to a selectable link that opens the destination (work instruction, website, image, etc.) in a new tab.
-
In the Type drop-down list, select the desired feature type:
-
Variable. Measured feature values such as diameter, temperature, weight, height, etc.
-
Defect. Total number of defect occurrences during an inspection. Multiple defects may occur on a single piece. During data collection, you select the defect code from the associated Code Group.
In the Code Group drop-down list, select the desired code group. Hint

-
Defective. Number of pieces that failed a particular inspection. A single piece is either defective or not. During data collection, you select the defective code from the associated Code Group. If the Weight of the selected defective code equals 0 (zero), the piece passes. If the Weight of the selected defective code is greater than 0 (zero), the piece fails.
In the Code Group drop-down list, select the desired code group. Hint
-
Checklist. Set of one or more questions that collect situational or environmental data (for example, Has all previous product been cleared from the line?), which can be manually opened or automatically triggered. For more information, please see Checklists.
-
In the Question Text data field, type the desired checklist question.
-
In the Response Group drop-down list, select the desired response group. Hint
-
-
Verification. Collected value that Enact compares to one or more stored values (part tag or lot tag) for verification, which could include packaging UPCs (barcodes), artwork, or best-by dates. Stored Boolean values can be used to evaluate logical conditions or enforce business rules such as dual verification. For more information, please see Configuring Verification Features.
-
In the Entity Type drop-down list, select the comparison tag type (Lot Tag or Part Tag).
-
In the Tag Group drop-down list, select the desired tag group containing the comparison tags. Hint
-
-
-
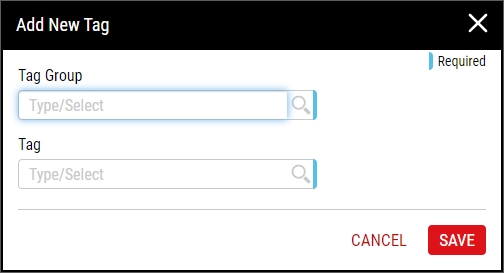
Using tags, you can provide additional characteristics to further identify the feature. To add tags to the feature, do the following:
- Select Save.