Creating Notification Rules
Using this procedure, you will create the notification rule.
By default, Enact automatically updates notification rules every 10 minutes, which means there will be a slight delay before you see recent changes. To manually reload existing notification rules and apply recent changes, please see Updating Notification Rules.
- Select Access Menu and then select Analysis | Notification Rules.
-
In the Notification Rules landing page, select Create Notification Rule.
- In the Notification Rule Name data field, type the notification rule name.
-
In the Category drop-down list, select the category:
-
Manufacturing Limit Violation. Set the notification rules for manufacturing limit violations (net content control and specification limit), using the following tabs:
-
 Alarm Type Tab
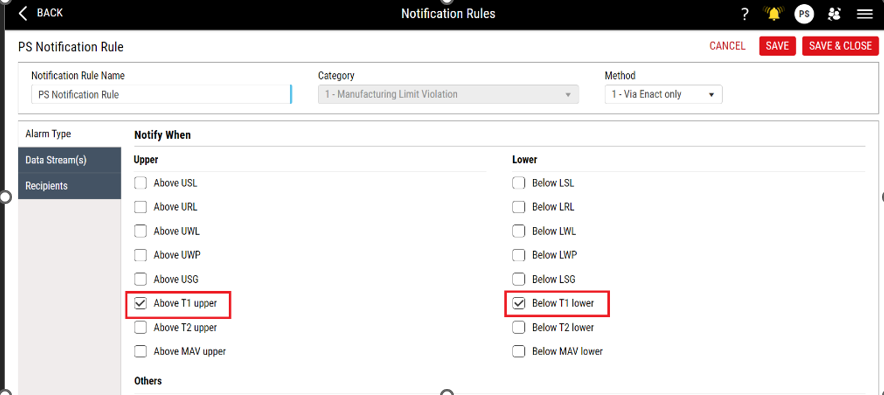
Under the Alarm Type tab, you will configure manufacturing limit violation (net content control and specification limit) notification rules to generate an alarm (notification). The notification rules allow you to specify which alarm types (above USL, below LSL, above T2, below MAV, etc.) to apply to which features, parts, or processes, and also specify which users are notified when the notification rule is broken. For example, you might create a notification rule for Outside Diameter spec limit violations for the rims part family, which is sent to the supervisors of that area.
- In the Create Notification Rule page, select the Alarm Type tab.
-
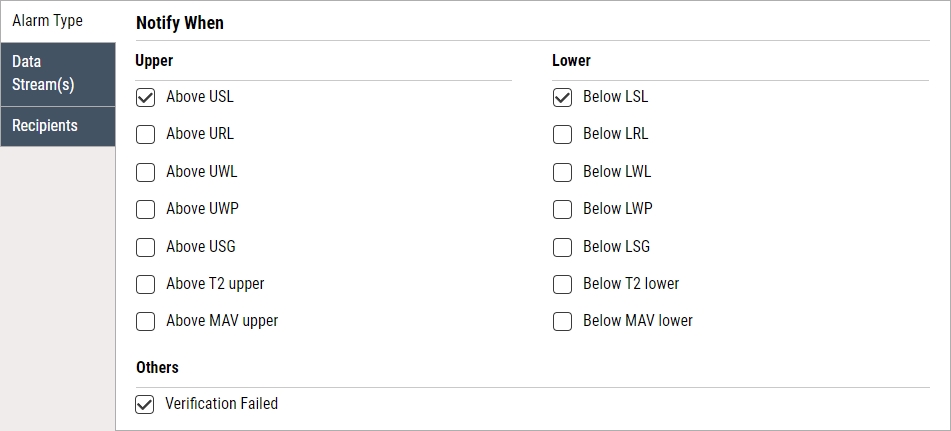
Under the Alarm Type tab, select the desired manufacturing limit violations:
- Above USL. Notify recipient(s) when the collected data is above the Upper Specification Limit.
- Above URL. Notify recipient(s) when the collected data is above the Upper Reasonable Limit.
- Above UWL. Notify recipient(s) when the collected data is above the Upper Warning Limit.
- Above UWP. Notify recipient(s) when the collected data is above the Upper Within-Piece Limit.
- Above USG. Notify recipient(s) when the collected data is above the Upper Subgroup Limit.
- Above T1 upper. Notify recipient(s) when the collected data is above the T1 Upper.
- Above T2 upper. Notify recipient(s) when the collected data is above the T2 Upper.
- Above MAV upper. Notify recipient(s) when the collected data is above the Maximum Allowable Variation Upper.
- Below LSL. Notify recipient(s) when the collected data is below the Lower Specification Limit.
- Below LRL. Notify recipient(s) when the collected data is below the Lower Reasonable Limit.
- Below LWL. Notify recipient(s) when the collected data is below the Lower Warning Limit.
- Below LWP. Notify recipient(s) when the collected data is below the Lower Within-Piece Limit.
- Below LSG. Notify recipient(s) when the collected data is below the Lower Subgroup Limit.
- Below T1 lower. Notify recipient(s) when the collected data is below the T1 Lower.
- Below T2 lower. Notify recipient(s) when the collected data is below the T2 Lower.
- Below MAV lower. Notify recipient(s) when the collected data is below the Maximum Allowable Variation Lower.
- Verification Failed. Notify recipient(s) when the collected value does not match the verification value.
-
Data Stream(s) Tab
Under the Data Stream(s) tab, you can control the notifications based on one or more descriptors. Notification rules are real-time triggers that issues warnings when an event occurs. This can be done Dynamically, where you select a descriptor category (for example, Part Family, Tag Group, or Operation), or Statically, where you select a specific descriptor.
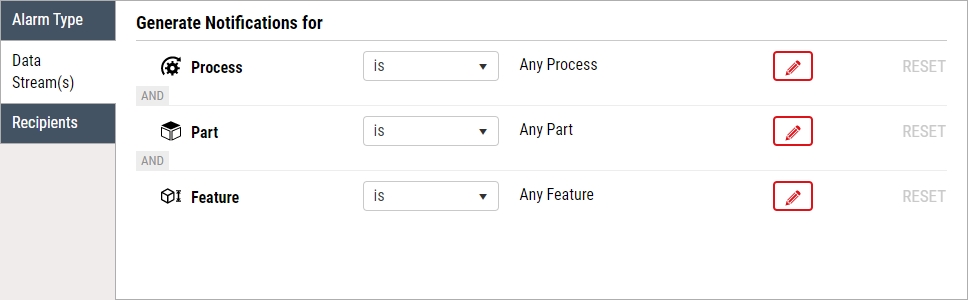
To control the notifications based on one or more descriptors, do the following:
- To include designated descriptor, select is.
- To exclude designated descriptor, select is not.
-
To select descriptors, select Change for the desired descriptor, and then configure the selection:
-
Process
- To add processes based on operation, select the Dynamic radio button, select Operation, and in the Operation drop-down list, select the desired operations, and then select Apply.
-
To add processes based on tags, select the Dynamic radio button, select Tag Group, and then do the following:
- In the Tag Group drop-down list, select the desired tag group. Hint
- In the Tag drop-down list, select the desired tags.
- Select Apply.
- In the Tag Group drop-down list, select the desired tag group. Hint
-
To add individual processes, select the Static radio button, and then do the following:
-
Part
- To add parts based on part family, select the Dynamic radio button, select Part Family, and in the Part Family drop-down list, select the desired part families, and then select Apply.
-
To add parts based on tags, select the Dynamic radio button, select Tag Group, and then do the following:
- In the Tag Group drop-down list, select the desired tag group. Hint
- In the Tag drop-down list, select the desired tags.
- Select Apply.
- In the Tag Group drop-down list, select the desired tag group. Hint
-
To add individual parts, select the Static radio button, and then do the following:
-
Select Select for each desired part.
To add part revisions, select the desired part revisions in the drop-down list. To include all current and future part revisions, select Select All in the drop-down list.
-
Select Apply.
-
-
Feature
- To add features based on operation, select the Dynamic radio button, select Operation, and in the Operation drop-down list, select the desired operations, and then select Apply.
-
To add features based on tags, select the Dynamic radio button, select Tag Group, and then do the following:
- In the Tag Group drop-down list, select the desired tag group. Hint
- In the Tag drop-down list, select the desired tags.
- Select Apply.
- In the Tag Group drop-down list, select the desired tag group. Hint
- To add individual features, select the Static radio button, select Select for each desired feature, and then select Apply.
-
-
Recipients Tab
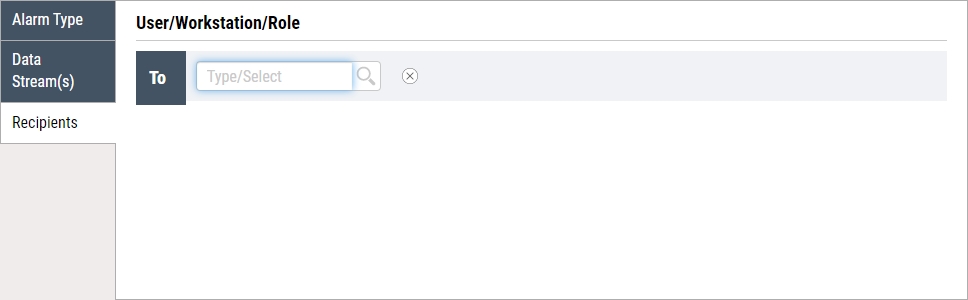
Under the Recipients tab, you will configure who/where notifications are sent. Notifications can be sent to users, workstations, or roles. While all selected users, workstations, or roles will see notifications in the notification tile, only selected users or roles will receive emails. For example, you might set the Rims Supervisor role as the recipient, which sends notifications of Outside Diameter spec limit violations for the rims part family to all supervisors of that area.
To configure your user account to receive email notifications, you must enable email notifications in your user settings. For more information, please see Notifications Tab in Configuring User Settings.
By default, the Checklist category Recipients tab automatically includes Checklist Assigned Users and the Data Collection category Recipients tab automatically includes DC Assigned Users. To add more users, workstations, or roles, select Add.
- In the Create Notification Rule page, select the Recipients tab.
- Locate the next available recipient data field.
-
In the recipient drop-down list, select the desired username, workstation, or role. Hint
To remove an existing username, workstation, or role, select X.
-
-
Statistical Violation. Set the notification rules for statistical violations, using the following tabs:
-
Alarm Type Tab
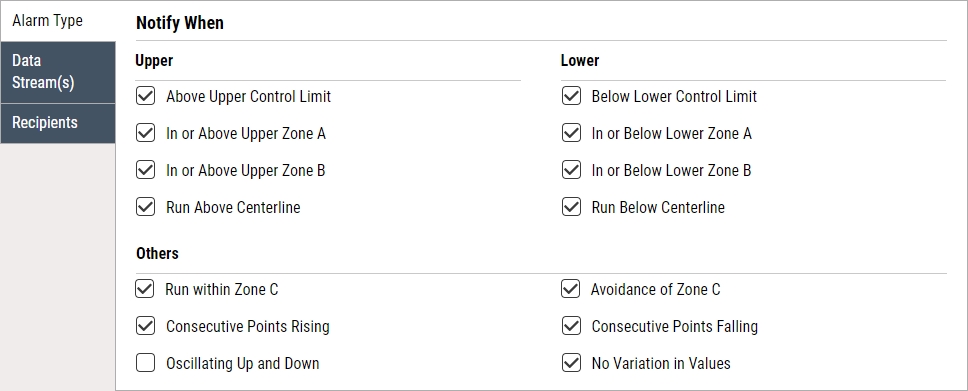
Under the Alarm Type tab, you will configure statistical violation notification rules to generate an alarm (notification). The notification rules allow you to specify which basic control chart statistical rules (above upper control limit, in or above upper zone A, in or above upper zone B, etc.) to apply to which features, parts, or processes, and also specify which users are notified when the notification rule is broken. The zones below represent areas in the control chart relative to the statistical mean. Zone A is the closest to the mean while Zone C is farthest from the mean. Any points plotted beyond Zone C will be considered above or below the control limit. For example, you might create a notification rule for Outside Diameter upper control limit violations for the Rims part family, which is sent to the supervisors of that area.
- In the Create Notification Rule page, select the Alarm Type tab.
-
Under the Alarm Type tab, select the desired statistical violations:
- Above upper control limit. Notify recipient(s) when the collected data are above the Upper Control Limit.
- In or above upper zone A. Notify recipient(s) when the collected data are in or beyond Zone A on the upper side of the mean.
- In or above upper zone B. Notify recipient(s) when the collected data are in or beyond Zone B on the upper side of the mean.
- Run above centerline. Notify recipient(s) when the collected data run above the center line.
- Below lower control limit. Notify recipient(s) when the collected data are below the Lower Control Limit.
- In or below lower zone A. Notify recipient(s) when the collected data are in or beyond Zone A on the lower side of the mean.
- In or below lower zone B. Notify recipient(s) when the collected data are in or beyond Zone B on the lower side of the mean.
- Run below centerline. Notify recipient(s) when the collected data run below the center line.
- Run within zone C. Notify recipient(s) when the collected data are in Zone C on either side of the mean.
- Consecutive points rising. Notify recipient(s) when the collected data are rising upwards.
- Oscillating up and down. Notify recipient(s) when the collected data produces a rhythmic and predictable variation between the upper and lower area of the mean causing an unusual or nonrandom pattern in the data.
- Avoidance of zone C. Notify recipient(s) when the collected data are outside of Zone C.
- Consecutive points falling. Notify recipient(s) when the collected data are decreasing downwards.
- No variation in values. Notify recipient(s) when the collected data show no variation.
-
Data Stream(s) Tab
Under the Data Stream(s) tab, you can control the notifications based on one or more descriptors. Notification rules are real-time triggers that issues warnings when an event occurs. This can be done Dynamically, where you select a descriptor category (for example, Part Family, Tag Group, or Operation), or Statically, where you select a specific descriptor.
To control the notifications based on one or more descriptors, do the following:
- To include designated descriptor, select is.
- To exclude designated descriptor, select is not.
-
To select descriptors, select Change for the desired descriptor, and then configure the selection:
-
Process
- To add processes based on operation, select the Dynamic radio button, select Operation, and in the Operation drop-down list, select the desired operations, and then select Apply.
-
To add processes based on tags, select the Dynamic radio button, select Tag Group, and then do the following:
- In the Tag Group drop-down list, select the desired tag group. Hint
- In the Tag drop-down list, select the desired tags.
- Select Apply.
- In the Tag Group drop-down list, select the desired tag group. Hint
-
To add individual processes, select the Static radio button, and then do the following:
-
Part
- To add parts based on part family, select the Dynamic radio button, select Part Family, and in the Part Family drop-down list, select the desired part families, and then select Apply.
-
To add parts based on tags, select the Dynamic radio button, select Tag Group, and then do the following:
- In the Tag Group drop-down list, select the desired tag group. Hint
- In the Tag drop-down list, select the desired tags.
- Select Apply.
- In the Tag Group drop-down list, select the desired tag group. Hint
-
To add individual parts, select the Static radio button, and then do the following:
-
Select Select for each desired part.
To add part revisions, select the desired part revisions in the drop-down list. To include all current and future part revisions, select Select All in the drop-down list.
-
Select Apply.
-
-
Feature
- To add features based on operation, select the Dynamic radio button, select Operation, and in the Operation drop-down list, select the desired operations, and then select Apply.
-
To add features based on tags, select the Dynamic radio button, select Tag Group, and then do the following:
- In the Tag Group drop-down list, select the desired tag group. Hint
- In the Tag drop-down list, select the desired tags.
- Select Apply.
- In the Tag Group drop-down list, select the desired tag group. Hint
- To add individual features, select the Static radio button, select Select for each desired feature, and then select Apply.
-
-
Recipients Tab
Under the Recipients tab, you will configure who/where notifications are sent. Notifications can be sent to users, workstations, or roles. While all selected users, workstations, or roles will see notifications in the notification tile, only selected users or roles will receive emails. For example, you might set the Rims Supervisor role as the recipient, which sends notifications of Outside Diameter spec limit violations for the rims part family to all supervisors of that area.
To configure your user account to receive email notifications, you must enable email notifications in your user settings. For more information, please see Notifications Tab in Configuring User Settings.
By default, the Checklist category Recipients tab automatically includes Checklist Assigned Users and the Data Collection category Recipients tab automatically includes DC Assigned Users. To add more users, workstations, or roles, select Add.
- In the Create Notification Rule page, select the Recipients tab.
- Locate the next available recipient data field.
-
In the recipient drop-down list, select the desired username, workstation, or role. Hint
To remove an existing username, workstation, or role, select X.
-
-
Checklist Violation. Set the notification rules for checklist violations, using the following tabs:
-
Alarm Type Tab
Under the Alarm Type tab, you will configure checklist notification rules to notify when the track count for any checklist item has been exceeded. Currently this is the only option available for checklist violations and is turned on by default.
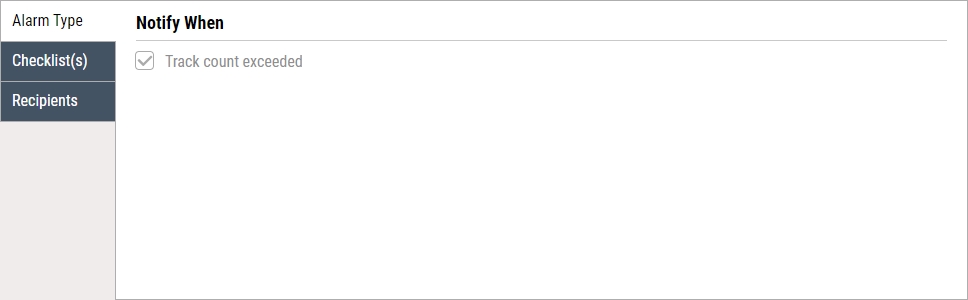
By default, Enact automatically sends a checklist violation notification upon exceeding the track count. For more information about designing checklists, please see Creating Checklists.
You cannot deselect this option.
-
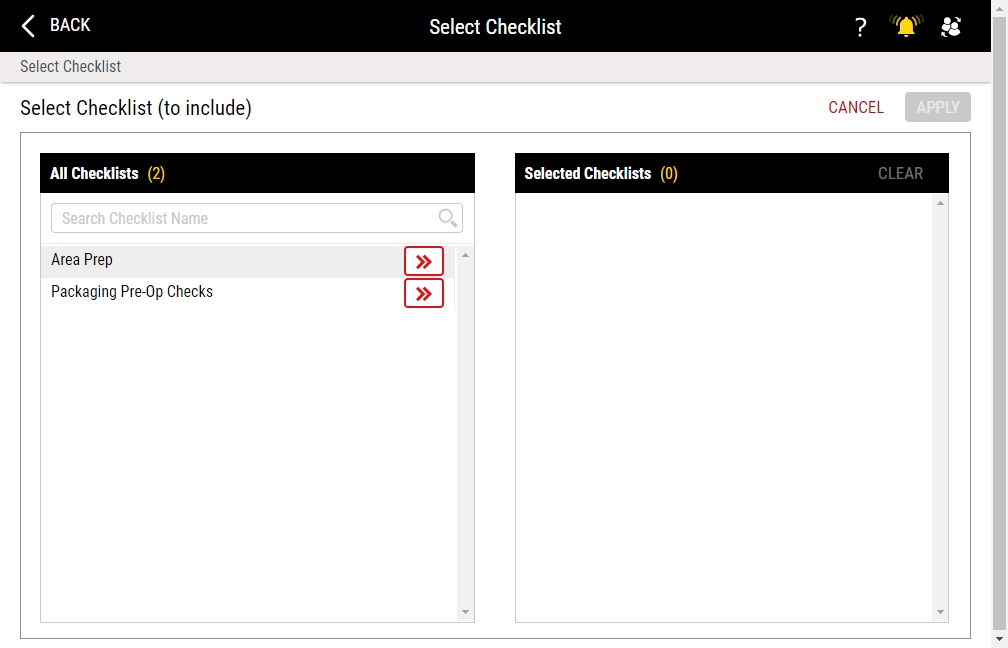
Checklist(s) Tab
Under the Checklist(s) tab, you will configure checklist notification rules to generate an alarm (notification). The notification rules allow you to specify which checklists to monitor for violations.

-
Recipients Tab
Under the Recipients tab, you will configure who/where notifications are sent. Notifications can be sent to users, workstations, or roles. While all selected users, workstations, or roles will see notifications in the notification tile, only selected users or roles will receive emails. For example, you might set the Rims Supervisor role as the recipient, which sends notifications of Outside Diameter spec limit violations for the rims part family to all supervisors of that area.
To configure your user account to receive email notifications, you must enable email notifications in your user settings. For more information, please see Notifications Tab in Configuring User Settings.
By default, the Checklist category Recipients tab automatically includes Checklist Assigned Users and the Data Collection category Recipients tab automatically includes DC Assigned Users. To add more users, workstations, or roles, select Add.
- In the Create Notification Rule page, select the Recipients tab.
- Locate the next available recipient data field.
-
In the recipient drop-down list, select the desired username, workstation, or role. Hint
To remove an existing username, workstation, or role, select X.
-
-
Checklist. Set the notification rules for timed checklists, using the following tabs:
-
Status Tab
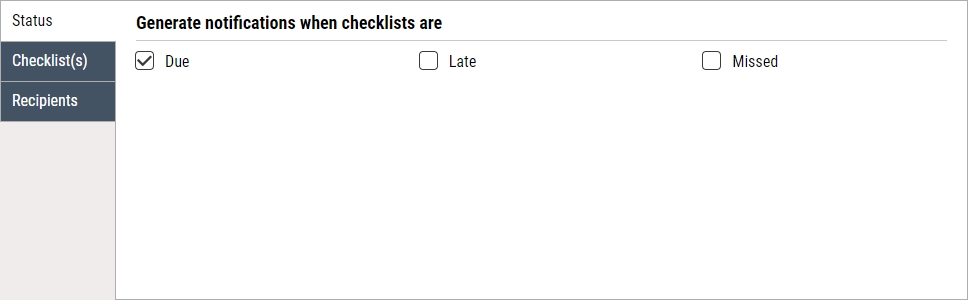
Under the Status tab, you can configure Enact to generate notifications based on the checklist status, including Due, Late, and Missed. This is useful for keeping operators informed on upcoming due checklists as well as keeping managers or supervisors informed on missed checklists. To report on the checklist compliance, you must configure the Status tab.
- In the Create Notification Rule page, select the Status tab.
-
Under the Status tab, select the desired statuses:
- Due. Notify recipient(s) when the selected checklists are due.
- Late. Notify recipient(s) when the selected checklists are late.
- Missed. Notify recipient(s) when the selected checklists are missed.
-
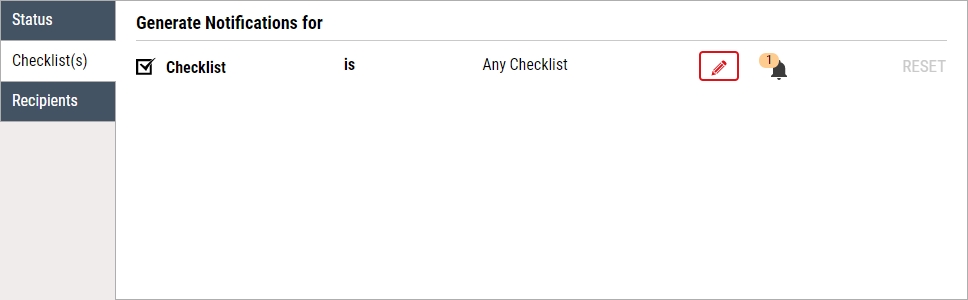
Checklist(s) Tab
Under the Checklist(s) tab, you will configure checklist notification rules to generate an alarm (notification) when the checklist exceeds its track count. The notification rules allow you to specify which checklists to monitor for violations.
-
Recipients Tab
Under the Recipients tab, you will configure who/where notifications are sent. Notifications can be sent to users, workstations, or roles. While all selected users, workstations, or roles will see notifications in the notification tile, only selected users or roles will receive emails. For example, you might set the Rims Supervisor role as the recipient, which sends notifications of Outside Diameter spec limit violations for the rims part family to all supervisors of that area.
To configure your user account to receive email notifications, you must enable email notifications in your user settings. For more information, please see Notifications Tab in Configuring User Settings.
By default, the Checklist category Recipients tab automatically includes Checklist Assigned Users and the Data Collection category Recipients tab automatically includes DC Assigned Users. To add more users, workstations, or roles, select Add.
- In the Create Notification Rule page, select the Recipients tab.
- Locate the next available recipient data field.
-
In the recipient drop-down list, select the desired username, workstation, or role. Hint
To remove an existing username, workstation, or role, select X.
-
-
Data Collection. Set the notification rules for timed data collections, using the following tabs:
-
Status Tab
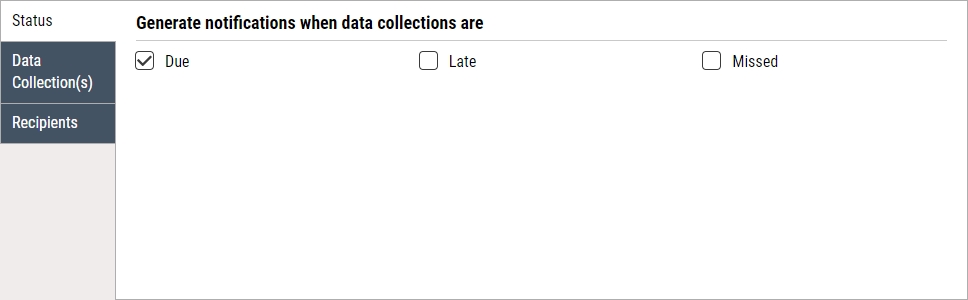
Under the Status tab, you can configure Enact to generate notifications based on the data collection status, including Due, Late, and Missed. This is useful for keeping operators informed on upcoming due data collections as well as keeping managers or supervisors informed on missed data collections. To report on the data collection compliance, you must configure the Status tab.
- In the Create Notification Rule page, select the Status tab.
-
Under the Status tab, select the desired statuses:
- Due. Notify recipient(s) when the selected data collections are due.
- Late. Notify recipient(s) when the selected data collections are late.
- Missed. Notify recipient(s) when the selected data collections are missed.
-
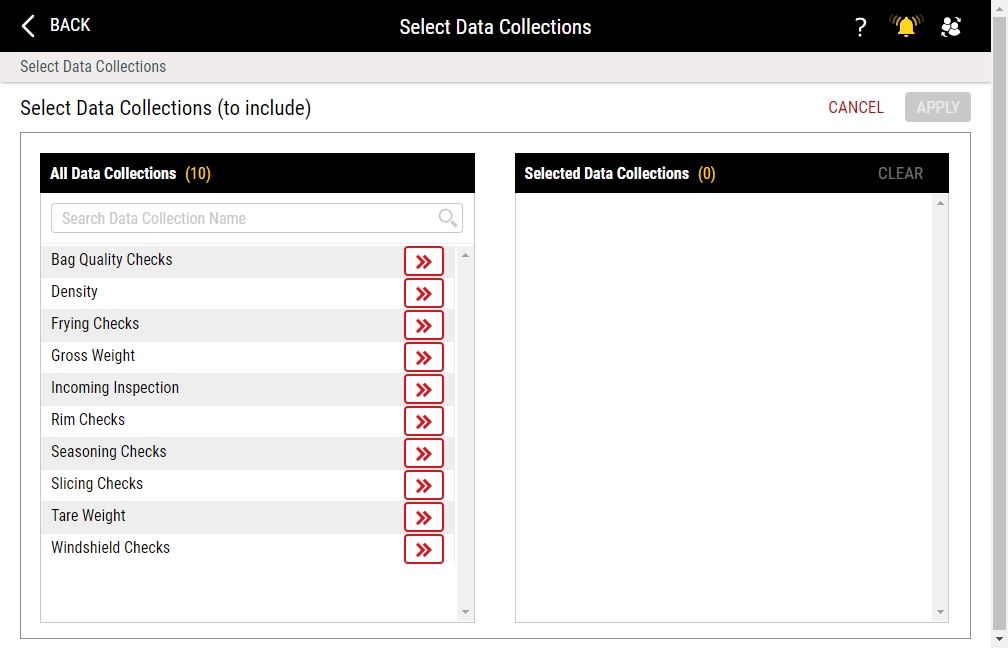
Data Collection(s) Tab
Under the Data Collection(s) tab, you will assign specific data collections that will be monitored for their status, including Due, Late, and Missed.

-
Recipients Tab
Under the Recipients tab, you will configure who/where notifications are sent. Notifications can be sent to users, workstations, or roles. While all selected users, workstations, or roles will see notifications in the notification tile, only selected users or roles will receive emails. For example, you might set the Rims Supervisor role as the recipient, which sends notifications of Outside Diameter spec limit violations for the rims part family to all supervisors of that area.
To configure your user account to receive email notifications, you must enable email notifications in your user settings. For more information, please see Notifications Tab in Configuring User Settings.
By default, the Checklist category Recipients tab automatically includes Checklist Assigned Users and the Data Collection category Recipients tab automatically includes DC Assigned Users. To add more users, workstations, or roles, select Add.
- In the Create Notification Rule page, select the Recipients tab.
- Locate the next available recipient data field.
-
In the recipient drop-down list, select the desired username, workstation, or role. Hint
To remove an existing username, workstation, or role, select X.
-
-
Defective. Set the notification rules for defectives, using the following tabs:
-
Alarm Type Tab
Under the Alarm Type tab, you will configure defective violation notification rules to generate an alarm (notification) based on specific feature, part, or process combinations, and also specify which users are notified when the notification rule is broken.
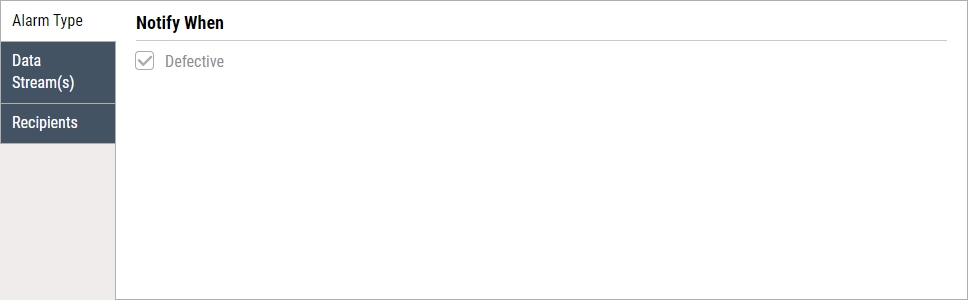
By default, Enact automatically sends a defective notification upon collecting defective code data.
You cannot deselect this option.
-
Data Stream(s) Tab
Under the Data Stream(s) tab, you can control the notifications based on one or more descriptors. Notification rules are real-time triggers that issues warnings when an event occurs. This can be done Dynamically, where you select a descriptor category (for example, Part Family, Tag Group, or Operation), or Statically, where you select a specific descriptor.
To control the notifications based on one or more descriptors, do the following:
- To include designated descriptor, select is.
- To exclude designated descriptor, select is not.
-
To select descriptors, select Change for the desired descriptor, and then configure the selection:
-
Process
- To add processes based on operation, select the Dynamic radio button, select Operation, and in the Operation drop-down list, select the desired operations, and then select Apply.
-
To add processes based on tags, select the Dynamic radio button, select Tag Group, and then do the following:
- In the Tag Group drop-down list, select the desired tag group. Hint
- In the Tag drop-down list, select the desired tags.
- Select Apply.
- In the Tag Group drop-down list, select the desired tag group. Hint
-
To add individual processes, select the Static radio button, and then do the following:
-
Part
- To add parts based on part family, select the Dynamic radio button, select Part Family, and in the Part Family drop-down list, select the desired part families, and then select Apply.
-
To add parts based on tags, select the Dynamic radio button, select Tag Group, and then do the following:
- In the Tag Group drop-down list, select the desired tag group. Hint
- In the Tag drop-down list, select the desired tags.
- Select Apply.
- In the Tag Group drop-down list, select the desired tag group. Hint
-
To add individual parts, select the Static radio button, and then do the following:
-
Select Select for each desired part.
To add part revisions, select the desired part revisions in the drop-down list. To include all current and future part revisions, select Select All in the drop-down list.
-
Select Apply.
-
-
Feature
- To add features based on operation, select the Dynamic radio button, select Operation, and in the Operation drop-down list, select the desired operations, and then select Apply.
-
To add features based on tags, select the Dynamic radio button, select Tag Group, and then do the following:
- In the Tag Group drop-down list, select the desired tag group. Hint
- In the Tag drop-down list, select the desired tags.
- Select Apply.
- In the Tag Group drop-down list, select the desired tag group. Hint
- To add individual features, select the Static radio button, select Select for each desired feature, and then select Apply.
-
-
Recipients Tab
Under the Recipients tab, you will configure who/where notifications are sent. Notifications can be sent to users, workstations, or roles. While all selected users, workstations, or roles will see notifications in the notification tile, only selected users or roles will receive emails. For example, you might set the Rims Supervisor role as the recipient, which sends notifications of Outside Diameter spec limit violations for the rims part family to all supervisors of that area.
To configure your user account to receive email notifications, you must enable email notifications in your user settings. For more information, please see Notifications Tab in Configuring User Settings.
By default, the Checklist category Recipients tab automatically includes Checklist Assigned Users and the Data Collection category Recipients tab automatically includes DC Assigned Users. To add more users, workstations, or roles, select Add.
- In the Create Notification Rule page, select the Recipients tab.
- Locate the next available recipient data field.
-
In the recipient drop-down list, select the desired username, workstation, or role. Hint
To remove an existing username, workstation, or role, select X.
-
-
System Alerts. Set the notification rules for system alerts, using the following tabs:
-
Recipients Tab
Under the Recipients tab, you will configure who/where notifications are sent. Notifications can be sent to users, workstations, or roles. While all selected users, workstations, or roles will see notifications in the notification tile, only selected users or roles will receive emails. For example, you might set the Rims Supervisor role as the recipient, which sends notifications of Outside Diameter spec limit violations for the rims part family to all supervisors of that area.
To configure your user account to receive email notifications, you must enable email notifications in your user settings. For more information, please see Notifications Tab in Configuring User Settings.
By default, the Checklist category Recipients tab automatically includes Checklist Assigned Users and the Data Collection category Recipients tab automatically includes DC Assigned Users. To add more users, workstations, or roles, select Add.
- In the Create Notification Rule page, select the Recipients tab.
- Locate the next available recipient data field.
-
In the recipient drop-down list, select the desired username, workstation, or role. Hint
To remove an existing username, workstation, or role, select X.
System alerts provide details about upcoming system maintenance, and are delivered via in-application notifications and email. System alerts do not appear in the Notifications tile or the Notifications menu, and will not trigger events. User, workstation, and role recipients will always receive system alerts notifications by emails, regardless of their Email notifications setting. For more information (if available), select View Detail.
By default, you will have at least one system alert notification rule assigned to the Admin role, which you cannot remove or deactivate, though you will be able to modify the list of recipients. If you create additional system alert notification rules, you will not be able to remove or deactivate those either.
-
-
General . Set the notification rules for flagged or edited subgroups.
-
Alarm Type Tab
Under the Alarm Type tab, check the Flagged Subgroup checkbox to generate a notification for a subgroup when it is flagged and the Edited Subgroup checkbox to generate a notification when a subgroup is edited.
-
Data Stream(s) Tab
Under the Data Stream(s) tab, you can control the notifications based on one or more descriptors. Notification rules are real-time triggers that issues warnings when an event occurs. This can be done Dynamically, where you select a descriptor category (for example, Part Family, Tag Group, or Operation), or Statically, where you select a specific descriptor.
To control the notifications based on one or more descriptors, do the following:
- To include designated descriptor, select is.
- To exclude designated descriptor, select is not.
-
To select descriptors, select Change for the desired descriptor, and then configure the selection:
-
Process
- To add processes based on operation, select the Dynamic radio button, select Operation, and in the Operation drop-down list, select the desired operations, and then select Apply.
-
To add processes based on tags, select the Dynamic radio button, select Tag Group, and then do the following:
- In the Tag Group drop-down list, select the desired tag group. Hint
- In the Tag drop-down list, select the desired tags.
- Select Apply.
- In the Tag Group drop-down list, select the desired tag group. Hint
-
To add individual processes, select the Static radio button, and then do the following:
-
Part
- To add parts based on part family, select the Dynamic radio button, select Part Family, and in the Part Family drop-down list, select the desired part families, and then select Apply.
-
To add parts based on tags, select the Dynamic radio button, select Tag Group, and then do the following:
- In the Tag Group drop-down list, select the desired tag group. Hint
- In the Tag drop-down list, select the desired tags.
- Select Apply.
- In the Tag Group drop-down list, select the desired tag group. Hint
-
To add individual parts, select the Static radio button, and then do the following:
-
Select Select for each desired part.
To add part revisions, select the desired part revisions in the drop-down list. To include all current and future part revisions, select Select All in the drop-down list.
-
Select Apply.
-
-
Feature
- To add features based on operation, select the Dynamic radio button, select Operation, and in the Operation drop-down list, select the desired operations, and then select Apply.
-
To add features based on tags, select the Dynamic radio button, select Tag Group, and then do the following:
- In the Tag Group drop-down list, select the desired tag group. Hint
- In the Tag drop-down list, select the desired tags.
- Select Apply.
- In the Tag Group drop-down list, select the desired tag group. Hint
- To add individual features, select the Static radio button, select Select for each desired feature, and then select Apply.
-
-
Recipients Tab
Under the Recipients tab, you will configure who/where notifications are sent. Notifications can be sent to users, workstations, or roles. While all selected users, workstations, or roles will see notifications in the notification tile, only selected users or roles will receive emails. For example, you might set the Rims Supervisor role as the recipient, which sends notifications of Outside Diameter spec limit violations for the rims part family to all supervisors of that area.
To configure your user account to receive email notifications, you must enable email notifications in your user settings. For more information, please see Notifications Tab in Configuring User Settings.
By default, the Checklist category Recipients tab automatically includes Checklist Assigned Users and the Data Collection category Recipients tab automatically includes DC Assigned Users. To add more users, workstations, or roles, select Add.
- In the Create Notification Rule page, select the Recipients tab.
- Locate the next available recipient data field.
-
In the recipient drop-down list, select the desired username, workstation, or role. Hint
To remove an existing username, workstation, or role, select X.
-
-
-
In the Method drop-down list, select the desired notification method, as follows:
-
None (Inactive). Do not notify recipients. Enact will not display notifications in the Notifications tile or Notifications (bell) menu, and will not send notifications by email, regardless of the user Email notifications setting.
-
Via Enact only. Notify recipients in the Notifications tile and the Notifications (bell) menu. Enact will not send notifications by email, regardless of the user Email notifications setting.
-
Via Enact and Email. Notify recipients in the Notifications tile and the Notifications (bell) menu, and also send notifications by email, depending on the user Email notifications setting.
-
- Select Save, or select Save & Close to save and close the page.