Creating Parts
Using this procedure, you will create the part.
- Select Access Menu and then select Part | Parts.
-
In the Parts landing page, select Create Part.
-
Modify the contents under the following tabs:
-
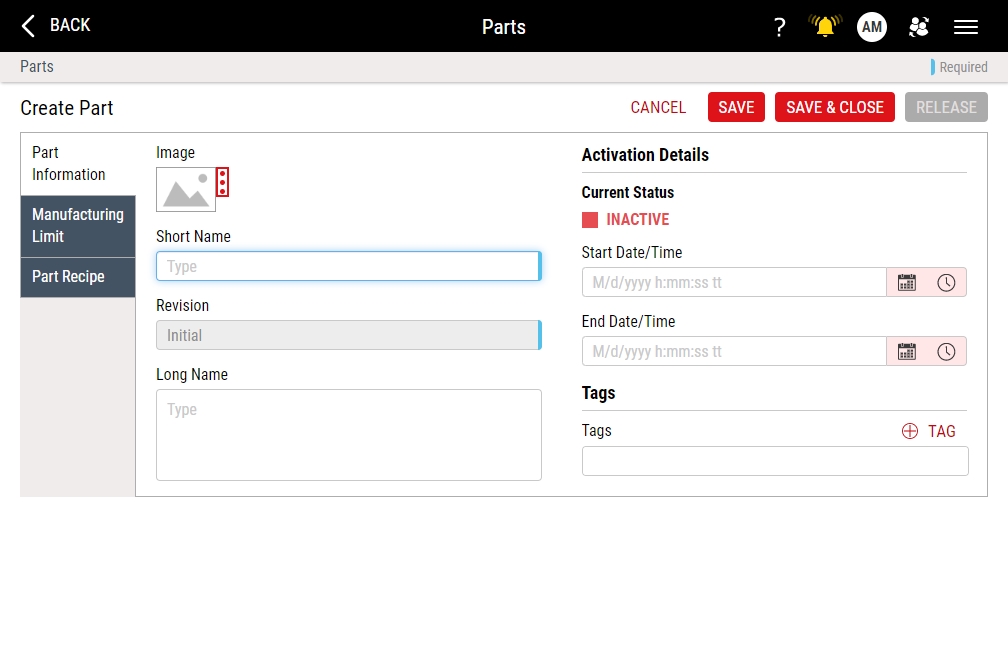
 Part Information Tab
Under the Part Information tab, you can configure the part settings, including uploading, changing, and removing the part image, setting the part activation start and end date/time, and assigning tags to the part for further identification.
-
In the Short Name data field, type the part name.
If you type a name of a removed part, Enact displays the message, "Short name already exists as removed record." Do one of the following:
- Type a different name.
- Restore the removed part and modify its settings. For more information, please see Restoring Removed Parts.
- Purge the removed records. For more information, please see Purging Data.
-
To configure the part image, locate the optional image item, and then do one of the following:
- To upload an image when no image currently exists, select More, select Upload Image, and then browse to the new image (maximum image size 600 KB; file types JPG, GIF, PNG, BMP).
- To change an existing image, select More, select Change Image, and then browse to the new image (maximum image size 600 KB).
- To remove an existing image, select More and then select Remove Image.
InfinityQS recommends resizing images to an aspect ratio of 4:3 (for example, 160 pixels wide by 120 pixels tall).
- In the Long Name data field, type the extended name of the part.
-
In the Activation Details section, you can manually set the part activation Start Date & Time and End Date & Time.
When a part is inactive, you will not be able to select that part anywhere in Enact.
Also, if you create a part and do NOT manually set the Start Date & Time, Enact automatically activates the part, setting the Start Date & Time to the date and time you saved the part.
To manually set the date and time, do the following:
-
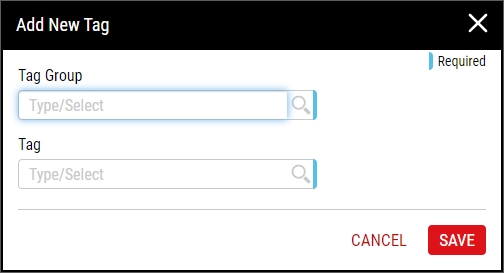
Using tags, you can provide additional characteristics to further identify the part. To add tags to the part, do the following:
-
-
Manufacturing Limit Tab
Under the Manufacturing Limit tab, you can identify the tolerances or engineering limits for a part and feature combination to determine product acceptability. You must define manufacturing limits before defining certain statistics, including Cpk and Ppk.
-
Existing Manufacturing Limits
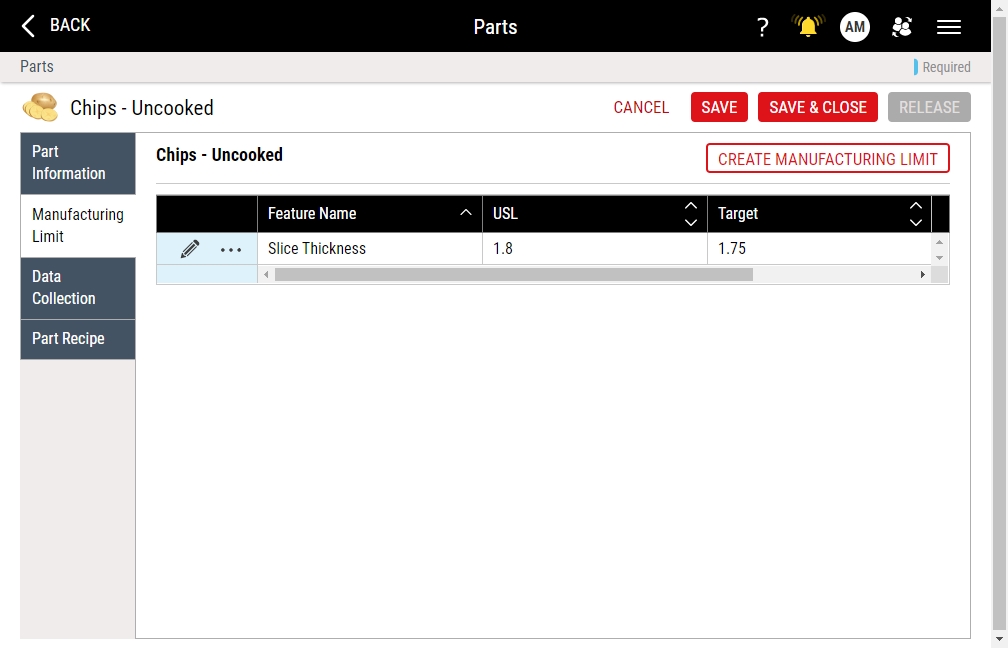
If manufacturing limits exist for the part, you can create new manufacturing limits, edit existing manufacturing limits, or remove existing manufacturing limits, as follows:
- To create new manufacturing limits, select Create Manufacturing Limits. For more information, please see Creating Manufacturing Limits.
- To edit existing manufacturing limits, select Edit. For more information, please see Editing Manufacturing Limits.
- To remove existing manufacturing limits, select More and then select Remove. In the Confirmation Message, select OK.
-
No Manufacturing Limits
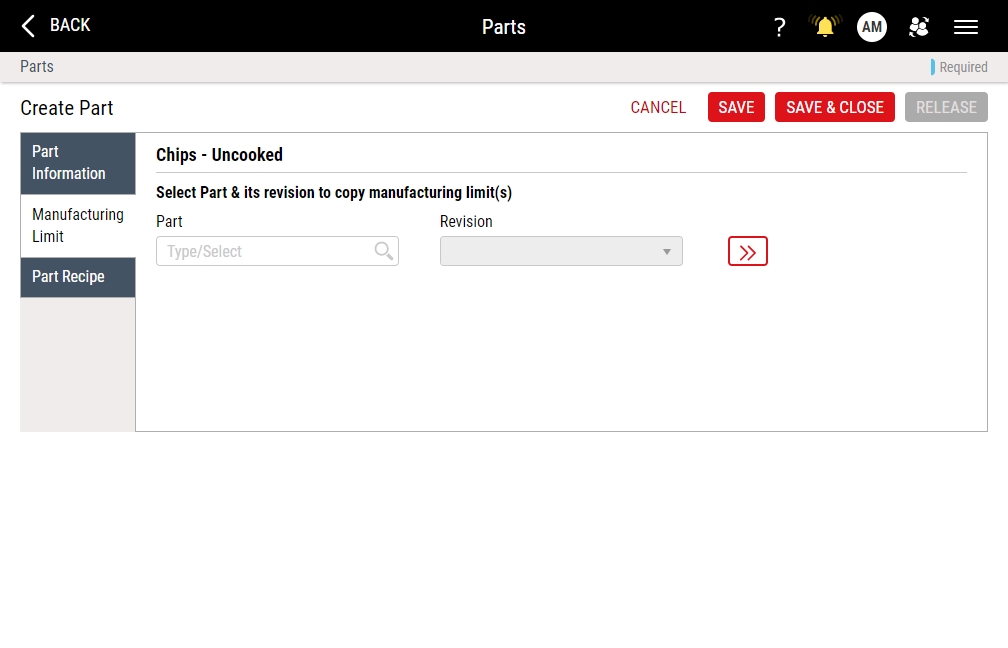
If no manufacturing limits exist for the part, you can copy manufacturing limits from a selected part to this part, as follows:
-
-
Part Recipe Tab
Under the Part Recipe tab, you can assign specific parts and quantities to input part families and to output part families, which define the materials that goes into the operation, and then subsequently comes out of the operation. You create, edit, and view part recipes on process models.
-
Existing Part Recipe
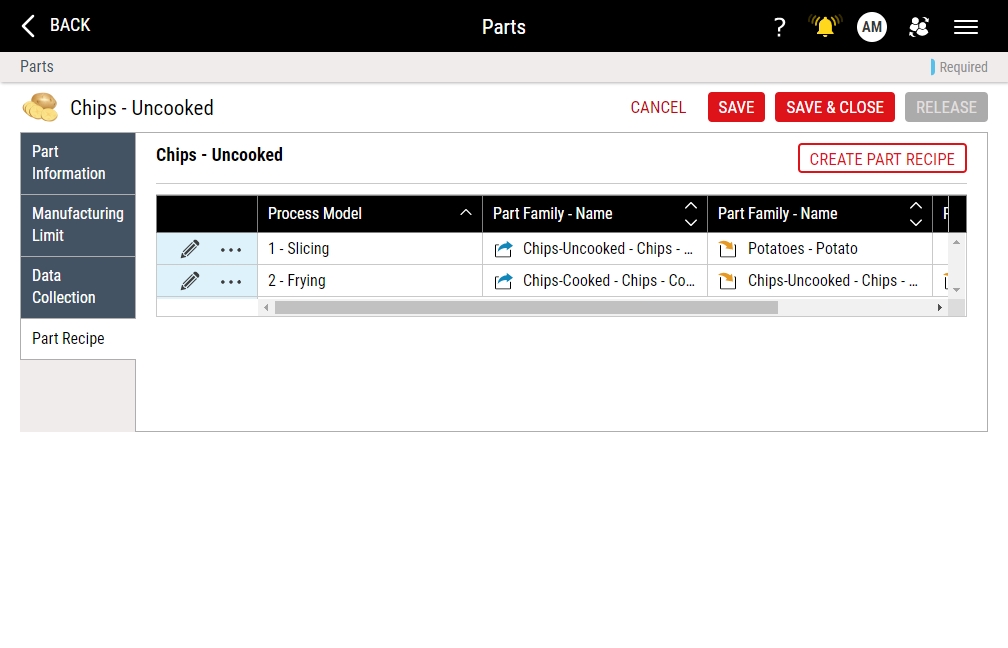
If a part recipe exists for the part, you can create a new part recipe, edit an existing part recipe, or remove an existing part recipe, as follows:
- To create a new part recipe, select Create Part Recipe. For more information, please see Creating Part Recipes.
- To edit existing part recipes, select Edit. For more information, please see Editing Part Recipes.
- To remove existing part recipes, select More and then select Remove. In the Confirmation Message, select OK.
-
No Part Recipe
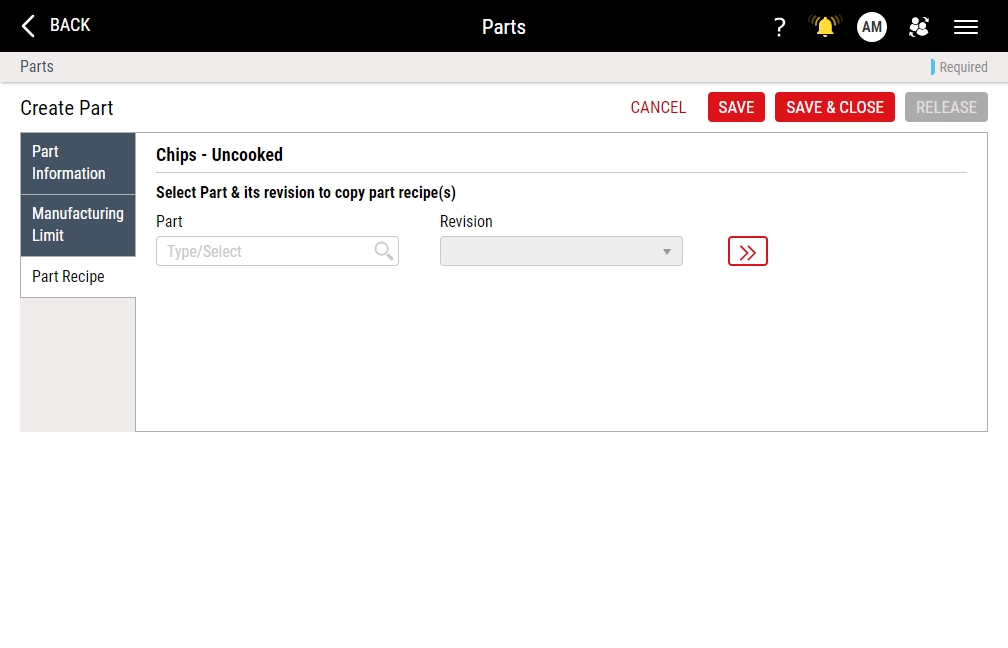
If no part recipe exists for the part, you can copy this part to every part recipe containing a selected part, as follows:
-
-
-
Select Save, or select Save & Close to save and close the page.
Enact always disables the Release button.