Managing Data Tables
The Data Table displays values for the individual subgroup and can be opened from the Finished Item tile on the work dashboard or the Collected Data Pareto tile on the raw dashboard.
-
Examine the Data Table. Note that its first three columns--Part, Process Name, and Piece Number--are locked but the remaining columns are scrollable. This helps keep these three details clear when looking at other columns.
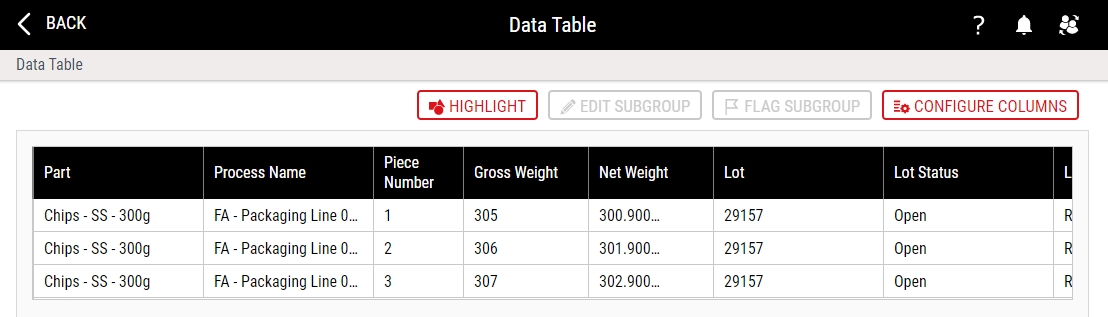
The Timestamp in the Data Table (for example, 11/14/2019 3:36:13 PM) indicates when the data was created, and cannot be changed. If you modify the data through the Data Table, Enact will not change this timestamp.
-
In the Data Table, you can do the following:
-
 Highlighting Subgroup Values
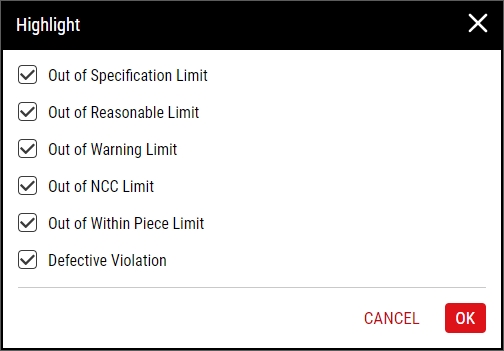
Highlight subgroup values that are outside of specific limits.
-
In the Data Table, select Highlight.
-
To highlight subgroup values that are outside of specific limits, select the desired violation.
To hide a column, deselect the desired violation.
- Select OK.
-
-
Editing Subgroup Values
Edit subgroup values for the desired subgroup.
-
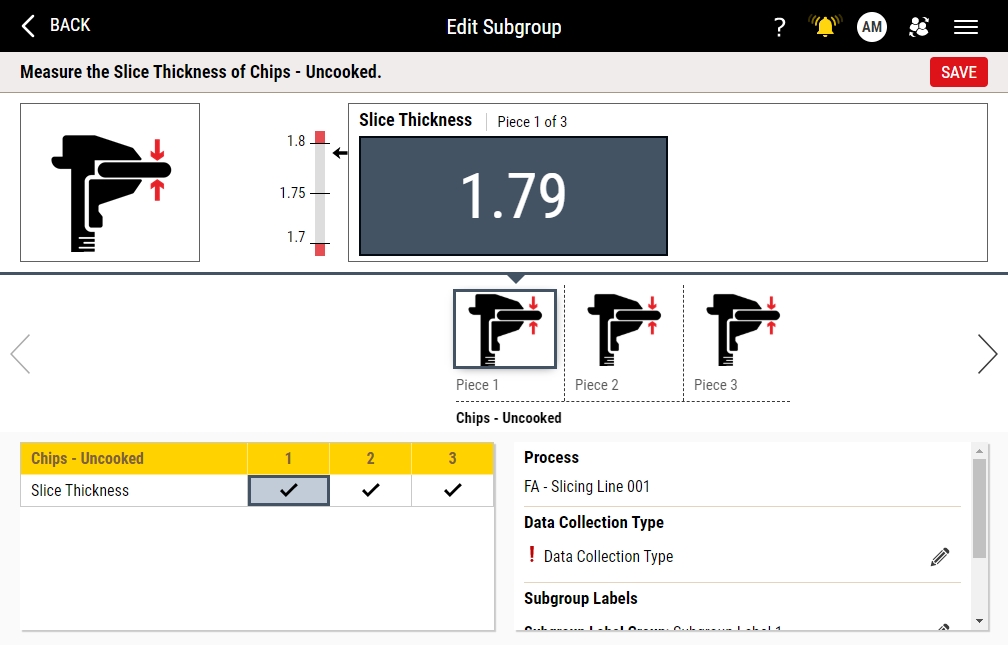
In the Data Table, select the desired subgroup row and then select Edit Subgroup. (Note that any feature in the table with fx beside it is a calculated feature, meaning that its values are calculated rather than manually collected. Hovering over fx displays the calculation.)
-
If an Edit Subgroup Confirmation Message appears, the subgroup you selected is a calculated one and, in this case, to edit it, you will need to edit one of the inputs to the calculation. If you do not wish to do this, click the message's Cancel button and discontinue this procedure. If you do, click OK and continue this procedure.
-
In the Edit Subgroup page, select the desired subgroup value in the Film Strip or the Collection Grid, and then edit the subgroup value in the collection data field. For calculated subgroups, the desired subgroup value would be an input to the calculation. For more information, please see Collecting Data.
In addition, you can do the following:
- Add, edit, or remove lot information, even if a lot was not assigned during the initial data collection or the data collection was not configured to prompt for a lot.
- Add, edit, or remove data collection type, even if a data collection type was not assigned during the initial data collection or the data collection was not configured to prompt for a data collection type.
Enact does not allow you to modify the process or part while editing subgroups.
-
Select Save.
-
In the Reason for Change prompt that appears, provide the reason for editing the subgroup and click OK.
Clicking OK triggers a notifications to be added to the Notifications and Process Information tiles.
After editing subgroup data, a number of updates occur:
-
Notifications are added to the Notifications and Process Information tiles.
-
Aggregated dashboards are updated (within an hour)
-
If the edit was to an input of a calculated subgroup, the calculation is immediately rerun.
-
A Change History record gets written with the Previous Value and the Current Value.
-
An Edited Subgroup event is generated.
-
The edit is logged on the Process Events page .
-
-
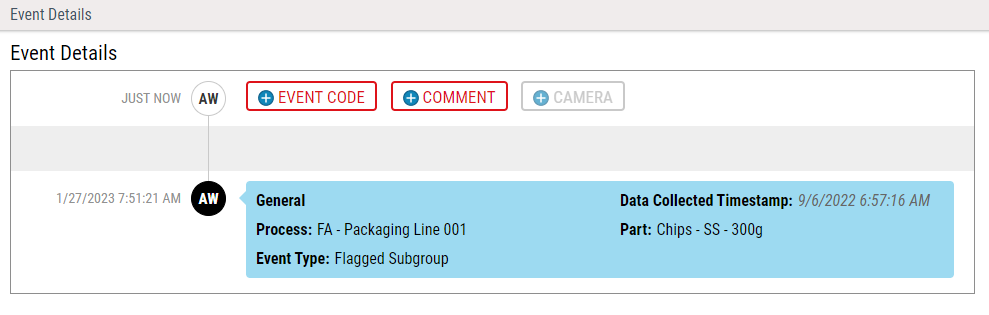
Flagging Subgroup
Flag a subgroup to enter comments for any observation.
-
In the Data Table, select the desired subgroup row, select View Subgroup Event.
-
Select OK to confirm event creation.
-
Select View Subgroup Event to view the event and add comments.
- Click Comment to enter a comment about the event.
-
-
Configuring Data Table Columns
Control the columns that Enact displays on the Data Table.
-
In the Data Table, select More and then select Configure Columns.
-
To display a column, select the desired column.
To hide a column, deselect the desired column. Note that the first three columns of the Data Table page--Part, Process Name, and Piece Number--cannot be hidden.
- Select Done.
-
-
-
Select Back.
Alternatively, to close the Data Table, select More and then select Restore.