Creating Lots
Using this procedure, you will create the lot.
- Select Access Menu and then select Labels | Lots.
-
In the Lots landing page, select Create Lot.
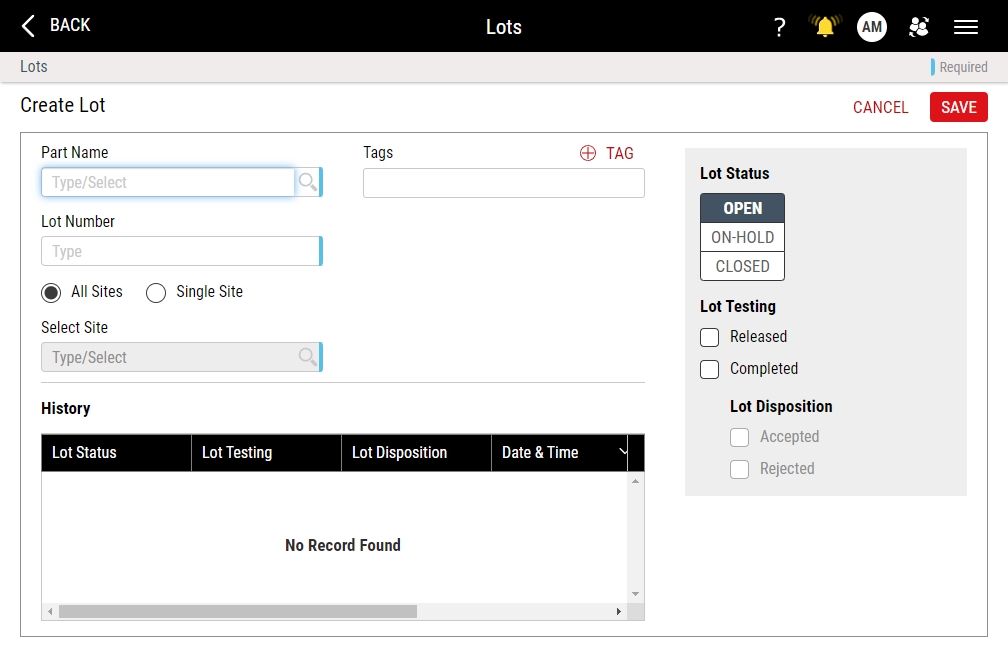
- In the Part Name drop-down list, select the desired part. Hint

- In the Lot Number data field, type the lot number.
-
To assign the lot to a specific site, do the following:
Why assign lots to sites?
During manual data collection or production assignment configuration, the assigned lot will only be visible and available at the assigned sites, reducing the number of lots choices and simplifying the experience for administrators and users.
-
Under the Lot Number data field, select Single Site.
- In the Select Site drop-down list, select the desired site. Hint
To disable lot-site assignment, making the lot visible and available to all sites, select All Sites.
-
-
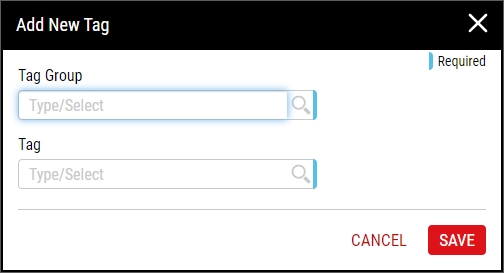
Using tags, you can provide additional characteristics to further identify the lot. To add tags to the lot, do the following:
-
In the Lot Status data field, select the desired lot status:
-
Open. The lot is active, and you can set Lot Testing to Released or Completed.
-
On-Hold. The lot cannot be used or selected, and you cannot set Lot Testing.
-
Closed. The lot is closed, and you cannot set Lot Testing.
-
If Lot Testing = Released, Enact automatically sets to Completed.
-
If Lot Testing is not selected, Enact does not change the setting.
-
When you change Lot Status, Enact automatically records status time, and does not allow you to manually change status time.
-
-
In the Lot Testing data field, select the desired lot testing:
-
[No Selection]. When collecting data or modifying production assignments, you will not be able to select the lot.
-
Released. When collecting data or modifying production assignments, you will be able to select the lot.
-
Completed. The lot is completed, preventing you from adding new subgroups to the lot. You may set the lot disposition, and Enact assembles aggregated data for the Lot Report and Aggregated Record Publishing. For more information, please see Managing Lot Report Tiles and Understanding Publishing.
If the completed lot contains no subgroups, the Lot Report displays the message, "No data collected."
-
-
In the Lot Disposition data field, select the desired lot disposition:
To set lot disposition, you must first set Lot Testing to Completed.
-
Accepted. The lot is marked as approved and available for use.
-
Rejected. The lot is marked as not accepted and should not be used.
If you have enabled lot publishing, Enact publishes an additional record with all lot information and the new lot disposition. This may result in multiple lot records for the same lot, including the lot record when you set Lot Testing to Completed and another lot record when you set Lot Disposition to Accepted or Rejected.
-
- Select Save.