Managing Compliance Tiles
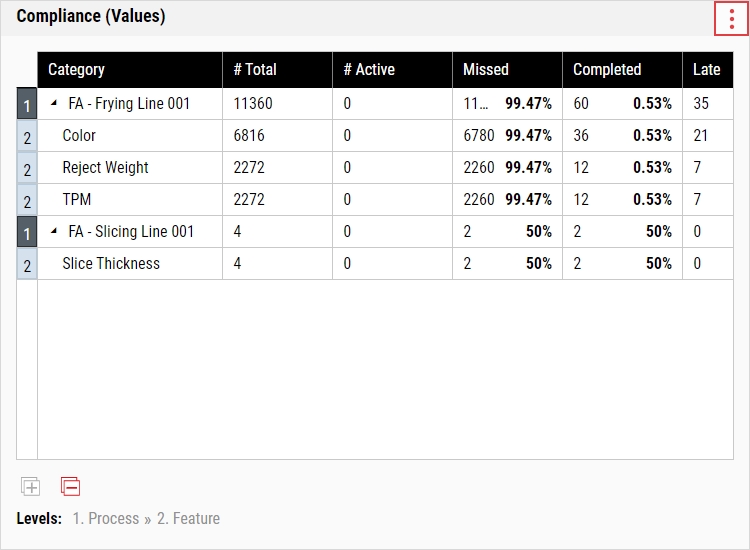
The Compliance tile displays the statistics for data collections configured with collection requirements, allowing you to view requirement collection data (total, completed, late, missed, etc.) in a single table.
- # Total. Number of available checks that have been completed or missed. This column does not include the active checks described below.
- # Active. Number of available checks that are currently due but have not been completed or missed.
- Missed. Number and percentage of checks that were not completed.
- Completed. Number and percentage of checks that were completed in time or late.
- Late. Number and percentage of checks that were completed late.
- On-Time. Number and percentage of checks that were completed during the correct interval.
- Most Recent Record. Time stamp for most recent completed check.
When you select the parameter set on the dashboard, it will affect the contents of this tile.
-
In the raw dashboard toolbar, select Add Tile and then select the Compliance tile.
-
In the Compliance tile, you can do the following:
-
Using parameter sets, you can select data on the Compliance tile using Time, Process, and Feature. For more information, please see Selecting Parameter Sets.
Using the dashboard parameter set filter, you can filter data on the Compliance tile using Process, Feature, Process tag group, Feature tag group, Time, and Shift. For more information, please see Filtering Dashboard Parameter Sets.
-
 Configuring Options
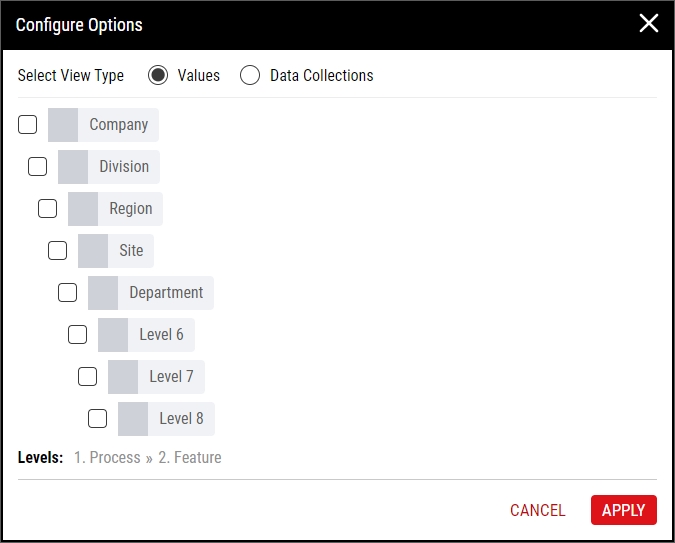
Using this procedure, you will organize compliance data (Missed, Completed, Late, etc.) into nested categories contained in two view types, Values and Data Collections. By default, Enact organizes data by the process directly associated with the data.
-
In the Compliance tile, select More and then select Configure Options.
-
In the Configure Options dialog box, do the following:
-
In the Select View Type data field, select the desired view type:
- Values. Display compliance data by count of samples and organized by selected hierarchy levels (Company, Division, Region, etc.) and feature.
- Data Collections. Display compliance data by count of data collections and organized by selected hierarchy levels (Company, Division, Region, etc.).
- Select Apply.
-
-
-
 Expanding Levels
Using this procedure, you will expand the processes to view the nested features.
To expand all levels, select Expand All.
- In the desired Compliance tile level, select Expand.
- The collapsed level expands.
-
 Collapsing Levels
Using this procedure, you will collapse the processes to hide the nested features.
To collapse all levels, select Collapse All.
- In the desired Compliance tile level, select Collapse.
- The expanded level collapses.
-
 Grouping Value Results
Using this procedure, you will control whether the Compliance tile displays all value results for each process or categorizes value results by feature under each process.
-
In the Compliance tile, select More and then select Configure Columns.
-
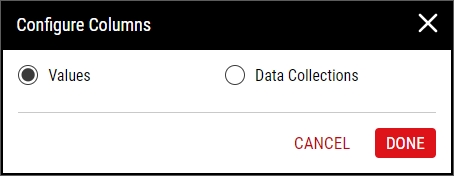
In the Configure Columns dialog box, select the desired grouping option to display:
- Values. Display all value results for each process.
- Data Collections. Display values results categorized by feature under each process.
- Select Done.
-
-
 Downloading Tiles
Using this procedure, you will download the contents of the Compliance tile into a Microsoft Excel spreadsheet.
-
In the locked dashboard, locate the Compliance tile.
For more information, please see Locking/Unlocking Dashboards.
- In the Compliance tile, select More and then select Download.
- In the Download dialog box, select Save, and in the Save As dialog box, browse to the desired save location on the computer (for example, the Windows Downloads folder).
-
In Microsoft Excel, open the saved file and examine the contents of the downloaded Compliance tile. Microsoft Excel displays the contents expanded or collapsed as it was in the Compliance tile.
-
-
 Removing Tiles
Using this procedure, you will remove the Compliance tile.
-
In the unlocked dashboard, locate the Compliance tile.
For more information, please see Locking/Unlocking Dashboards.
- In the Compliance tile, select More and then select Remove Tile.
- Select Save.
-
-


