Creating Checklist Requirements
Using this procedure, you will create the checklist requirement.
- Select Access Menu and then select Data Collection | Checklists.
-
In the Checklists landing page, select More and then select Create Requirement.
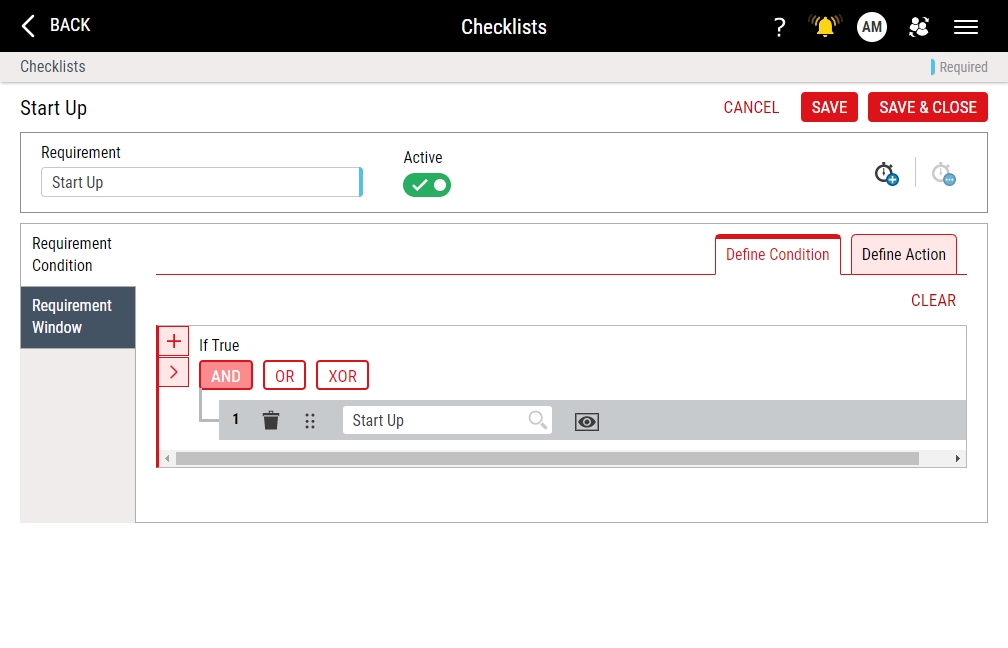
- In the Requirement data field, type the name of the requirement.
-
To activate the requirement, activate the Active slider.
To deactivate the requirement, deactivate the Active slider.
-
To edit existing requirements, do the following:
-
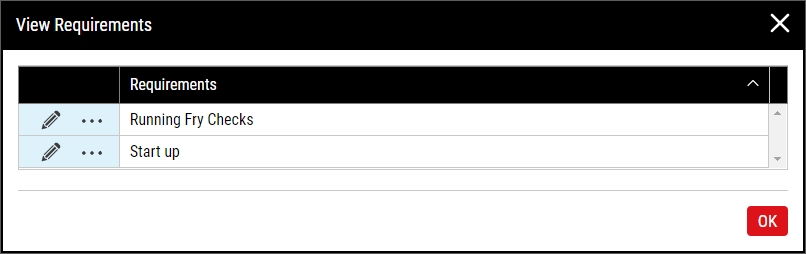
Select More Requirement(s).
-
In the View Requirements dialog box, select Edit.
-
-
Modify the contents under the following tabs:
-
 Requirement Condition Tab
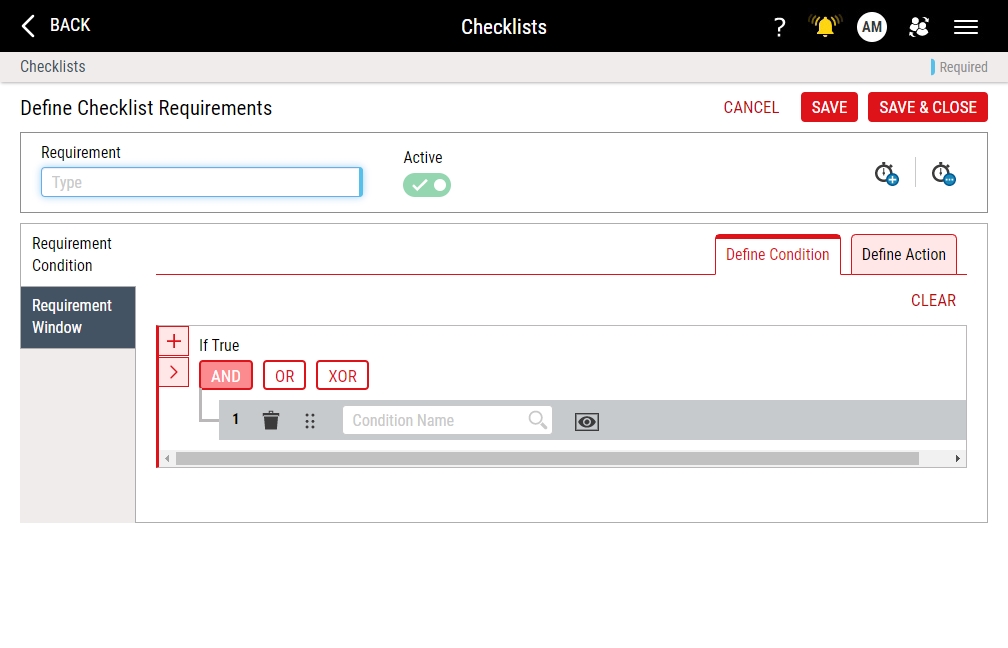
Under the Requirement Condition tab, you can define conditions that must be true for the requirement to initiate, and define the action, which sets how often the requirement initiates and for what process(es).
-
Under the Define Condition tab, do the following:
- In the Condition Name drop-down list, select the desired condition. Hint
-
To add a new condition, do the following:
- Select Add, if necessary. Enact adds the new condition entry at the same level as the previous condition entry (or at the root level if there are no other condition entries).
-
In the If True section, select the desired boolean operation:
- AND. If all of the condition entries below are true, the condition is true. Otherwise, the condition is false.
- OR. If any of the condition entries below are true, the condition is true. Otherwise, the condition is false.
- XOR. If one and only one of the condition entries below are true, the condition is true. Otherwise, the condition is false.
- In the Condition Name drop-down list, select the desired condition. Hint
- To add additional conditions at the same level, repeat the above steps.
-
To add a new nested condition, do the following:
- Select Nest. Enact adds a new nested condition entry below the current level.
-
In the If True section, select the desired boolean operation:
- AND. If all of the condition entries below are true, the condition is true. Otherwise, the condition is false.
- OR. If any of the condition entries below are true, the condition is true. Otherwise, the condition is false.
- XOR. If one and only one of the condition entries below are true, the condition is true. Otherwise, the condition is false.
- In the Condition Name drop-down list, select the desired condition. Hint
- To view a selected condition, select View Condition. To close the page, select Back or Cancel.
- To reorder the existing conditions (when more than one exists), select and drag Reorder.
- To remove an existing condition, select Delete.
- In the Condition Name drop-down list, select the desired condition. Hint
-
Under the Define Action tab, do the following:
-
To configure the requirement to initiate one time, select Run Once.
To configure the requirement to initiate at a specific interval, select Define Frequency, and then do the following:
-
In the Every data field, type the interval value, and in the drop-down list, select the interval time measurement.
- Day. If you select Days, Enact treats the selection as a calendar day, even if the day is modified by Daylight Saving Time. For example, if you set the frequency to be every day with a reference of 5:00 AM, Enact automatically adjusts a shortened or lengthened day to ensure the check occurs at 5:00 AM.
- Hour. If you select Hours, Enact always treats the selection as 60 minute intervals. For example, if you set the frequency to be every 24 hours, Enact will always wait the full 24 hours, regardless of a Daylight Saving adjustment.
-
To begin counting the interval from each completed checklist, select from last checklist.
To begin counting the interval from a reference point in time (forward or backward), select based on reference, and then select Calendar and select the desired reference date, and then select Time and select the desired reference time. For example, if you set the reference date/time to 12/14/2000 8:30:00 AM, Enact begins counting the interval from 30 minutes past the hour.
Keep in mind that the selected reference time is always local, and is not treated as a global time, or as part of a time zone, or stored as UTC and then calculated locally. The reference time will be used in the time zone of the process as written.
For example, if the reference time is 06:00 AM, a process in the London time zone will use 06:00 AM London time as the reference, and a process in the Seattle time zone will use 06:00 AM Seattle time as the reference.
-
To incorporate Daylight Saving time changes, ensuring you will always use the correct frequency and reference date/time, select Reset when daylight saving begins and ends.
If you select Days In the Every interval drop-down list, Enact disables Reset when daylight saving begins and ends.
- To restart the counter on a shift change, select Reset on shift change.
-
-
In the Specify Process section, select the process(es) assigned to this checklist. To select processes, do the following:
- Select Add Process.
- In the Criteria drop-down list, select Process.
-
Select the desired process. Hint
- To add additional processes, repeat the above steps.
To remove an existing process, select Delete.
-
-
-
Requirement Window Tab
Under the Requirement Window tab, you can define the total amount of time after the counter starts that the user has to complete the requirement before the requirement is considered missed, set the total amount of time after the counter starts that the user has to complete the requirement before the requirement is considered late, or set the total amount of time prior to the counter starting that Enact will notify the user of an upcoming checklist.
-
To set the total amount of time after the counter starts that the user has to complete the requirement before the requirement is considered missed, do the following:
- In the Deadline data field, type the interval value.
- In the Deadline drop-down list, select the interval time measurement (Days, Hours, Minutes, Months, Weeks, Years).
For example, if you set the Deadline data field to 30 Minutes, the user has 30 minutes to complete the requirement, after which the requirement is considered missed.
-
To set the total amount of time after the counter starts that the user has to complete the requirement before the requirement is considered late, do the following:
- Select Mark the checklist late if not collected.
- In the Late data field, type the interval value.
- In the Late drop-down list, select the interval time measurement (Days, Hours, Minutes, Months, Weeks, Years).
For example, if you set the Late data field to 10 Minutes, the user has 10 minutes to complete the requirement, after which the requirement is considered late.
-
To set the total amount of time prior to the counter starting that Enact will notify the user of an upcoming checklist, do the following:
- In the Early Reminder data field, type the interval value.
- In the Early Reminder drop-down list, select the interval time measurement (Days, Hours, Minutes, Months, Weeks, Years).
For example, if you set the Early Reminder data field to 5 Minutes, Enact notifies the user 5 minutes prior to the counter starting.
Enact will only evaluate the status of the assigned conditions upon a Deadline, Late, or Early Reminder timing change. Enact does not constantly monitor the status of the assigned conditions in the time leading up to the counter starting and while the counter runs. Consider the following examples:
- If you assign the Process State equals Run Standard condition, and the Early Reminder timer starts counting, Enact will not evaluate the value of the Process State again until the Early Reminder timer finishes, even if you changed the Process State to Shut Down immediately after the Early Reminder timer started.
- If you assign the Process State equals Run Heightened condition, and the Deadline timer starts counting, Enact will not evaluate the value of the Process State again until the Late timer or the Deadline timer finishes, even if you changed the Process State to Shut Down immediately after the Deadline timer started.
-
-
- Select Save, or select Save & Close to save and close the page.


